応援クリックよろしくお願いします!
ワードプレスで関連記事を表示させるプラグインYet Another Related Posts Plugin(YARPP)の使い方とカスタマイズ方法をcss付きでまとめます。
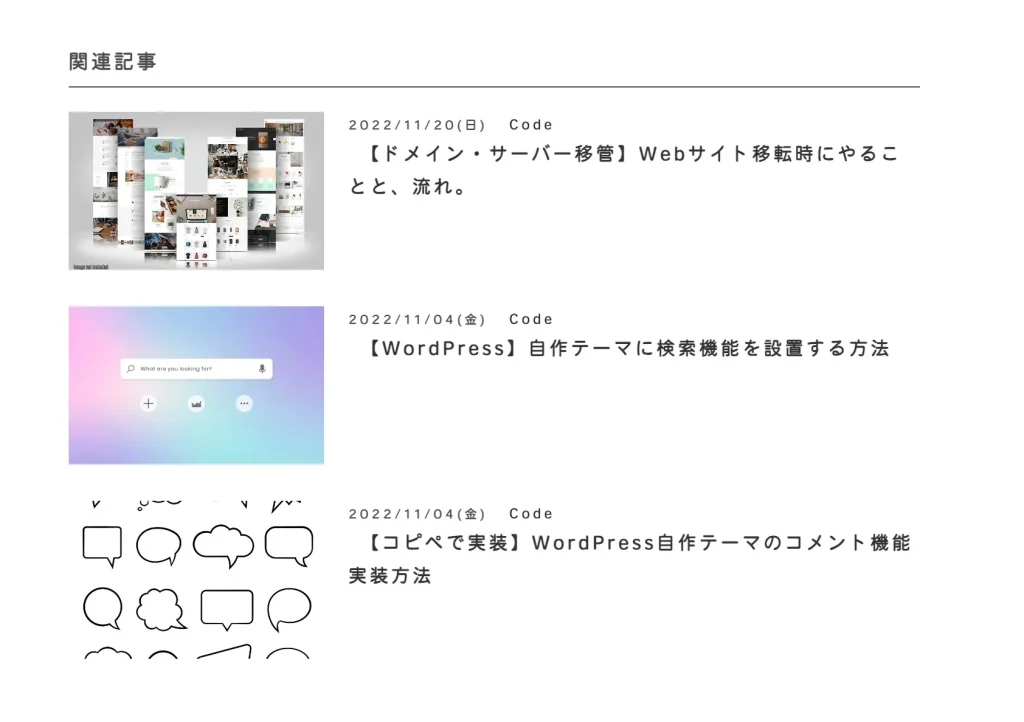
カスタマイズのイメージは以下の通り。このブログでも使ってるデザインです。
▼完成イメージーーーーーー
1.WordPressのダッシュボードよりプラグイン「YARPP」をインストール
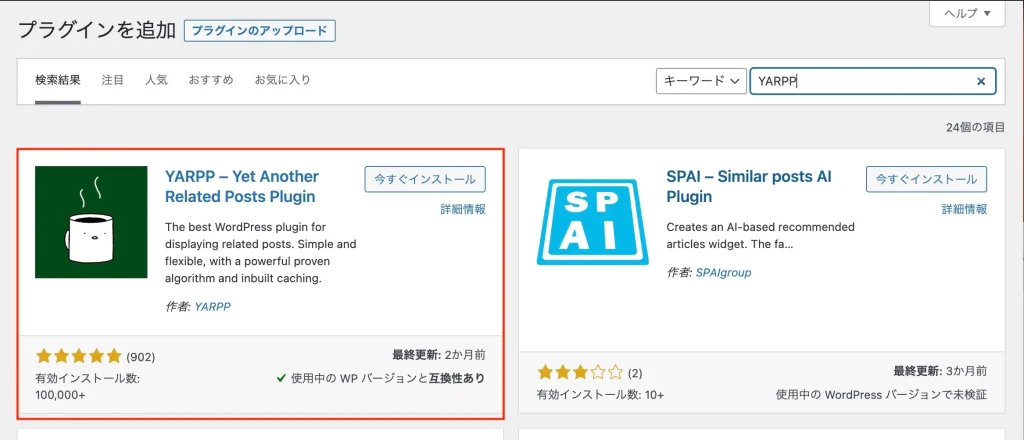
インストール後、「有効化」にしてください。
2.WordPressのプラグイン『YARPP』のカスタマイズ用テンプレート『yarpp-template-connect.php』の作成
yarpp-template-connect.phpを作成して、テーマフォルダと同じ階層に保存してください。
ドメイン名/public_html/wp-content/themes/ここに保存
以下が『YARPP』カスタマイズ用のテンプレートとなります。
コピペしてください。
<?php if (have_posts()) : ?>
<h4 class="post-connection">関連記事</h4>
<div class="related-post">
	<?php while (have_posts()) : the_post(); ?>
	<?php if (has_post_thumbnail()) : ?>
	<article>
		<div class="imgtxt">
			<a href="<?php the_permalink(); ?>">
				<?php
					$url = wp_get_attachment_url(get_post_thumbnail_id($post->ID));
					?>
				<?php if ($url) : ?>
				<div class="img bg" style="background-image: url( '<?php echo $url; ?>' );"></div>
				<?php endif; ?>
			</a>
		</div>
		<div class="ttl">
			<dl>
				<dt datetime="<?php the_time('Y-m-d'); ?>"><?php the_time('Y/m/d(D)') ?></dt>
				<dd>
					<p class="title"><a href="<?php the_permalink(); ?>"><?php the_title(); ?></a></p>
				</dd>
			</dl>
		</div>
	</article>
	<?php endif; ?>
	<?php endwhile; ?>
</div>
<?php else : ?>
<?php endif; ?>
サムネ画像はcssのbackground-imageで表示させてます。
10行目はサムネがなかった場合に表示させる画像です。
get_template_directory_uri() でテーマまでにディククトリを取得してるので以降をご自身のテーマの中にあるフォルダ名とnoimageの画像ファイル名に合わせて変更してください。
ドメイン名/public_html/wp-content/themes/image/ここにnoimage画像を保存
『YARPP』のカスタマイズ用CSS追加
cssはこちら。pc表示は横に3分割になるwidthしてます。
好みで変更してください。
スマホ表示の時は2分割になります。
.bg{
width: 100%;
background-size: cover;
background-repeat:repeat;
background-position:center center;
}
.post-connection{
text-align:left;
border-bottom: 1px solid #4a4a4a;
width: 100%;
padding:0 0 5px 0;
margin:40px 0 20px 0;
}
.post-connection::before{
content: "";
}
.related-post article{
width: 100%;
padding: 0;
display: flex;
margin-bottom:30px;
}
.related-post article .imgtxt{
width: 30%;
margin:0;
}
.related-post article .imgtxt .img{
margin: 0;
width: 100%;
}
.related-post article .ttl{
padding-left:20px;
}
.related-post h2{
padding: 10px 0;
font-size: 15px;
background-color:inherit;
border: none!;
font-weight: bold;
margin-top:0;
}
.related-post .title a{
font-weight:bold;
font-size: 15px;
}
.related-post p{
margin: 0;
}
.related-post a{
font-weight: normal;
color: #333;
}
@media screen and (max-width:768px){
.related-post .title a{
font-weight:bold;
font-size: 14px;
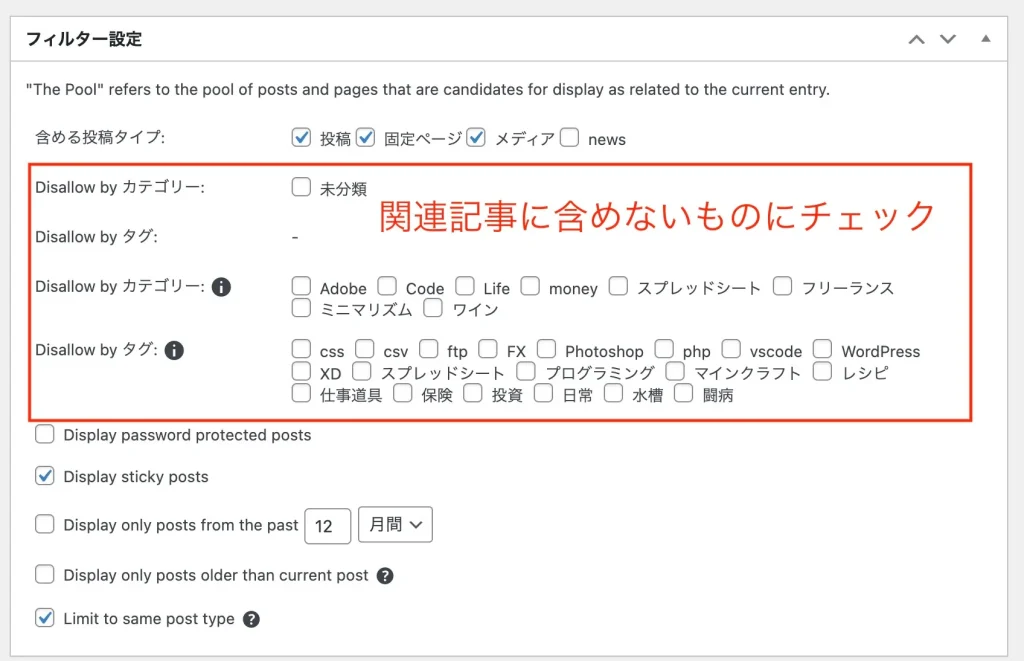
}ダッシュボードからYARPPの設定
フィルター設定
基本的には初期設定通りで問題ないです。
Disallow byと表示されているところにチェックをすると関連記事に表示されません。
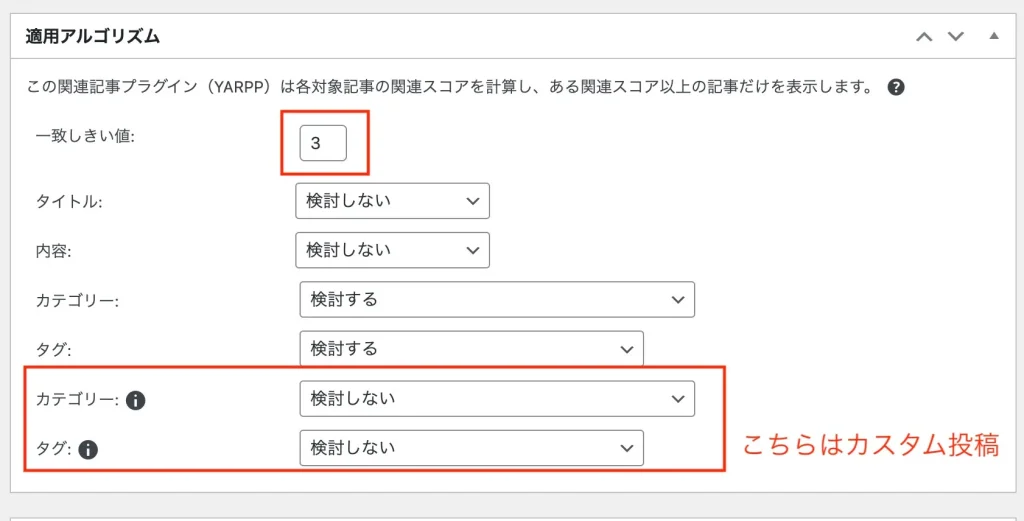
適用アルゴリズム
しきい値は記事が少ないうちは3くらいでいいかと。
自動表示設定
ここでは画像の通りに作成したテンプレートを選択します。
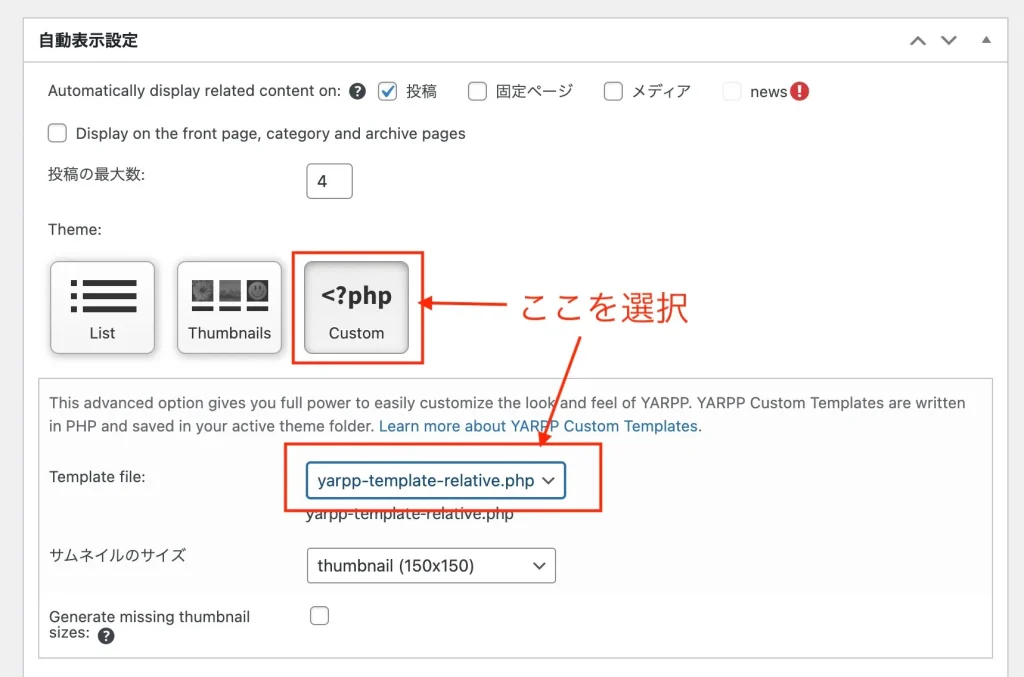
テンプレートを画像の通り選んでください。
今回cssで設定してるwidthの幅では6個で作るときれいに表示されます。
簡単ですね。
今回は以上です。
応援クリックよろしくお願いします!